The Best Easter Rocky Road Candy You’ll Ever Make

If you love chocolate, marshmallows, and a little crunch in every bite, then you’re about to fall in love with this Easter rocky road candy.
I first made it because I wanted a fun treat that was quick, colorful, and perfect for Easter.
The best part? It’s so easy, you don’t need to be an expert baker to pull it off. Trust me, once you make this, you’ll want to bring it out every Easter.
What Makes Easter Rocky Road Candy Special?
Rocky road has always been a favorite treat of mine because it’s sweet, chewy, and crunchy all at the same time. For Easter, I decided to give it a festive twist by adding pastel candies, mini eggs, and colorful marshmallows. It’s like all the best parts of Easter baskets packed into one delicious square.
The beauty of this recipe is that it’s no-bake. You just melt, mix, and chill. That’s it. You can even make it the night before Easter and wake up with a ready-to-serve treat.
Ingredients You’ll Need
Here’s what I usually add to my Easter rocky road candy, but feel free to play around with it:
- Chocolate: Milk or semi-sweet chocolate works best.
- Mini Marshmallows: Regular or pastel-colored for a festive look.
- Graham Crackers or Biscuits: For that crunchy bite.
- Easter Candies: Think mini eggs, candy-coated chocolates, or jelly beans.
- Nuts (optional): Almonds, peanuts, or hazelnuts for extra crunch.
That’s it—simple pantry staples with a holiday touch.
Step-by-Step Instructions
Step 1: Melt the Chocolate
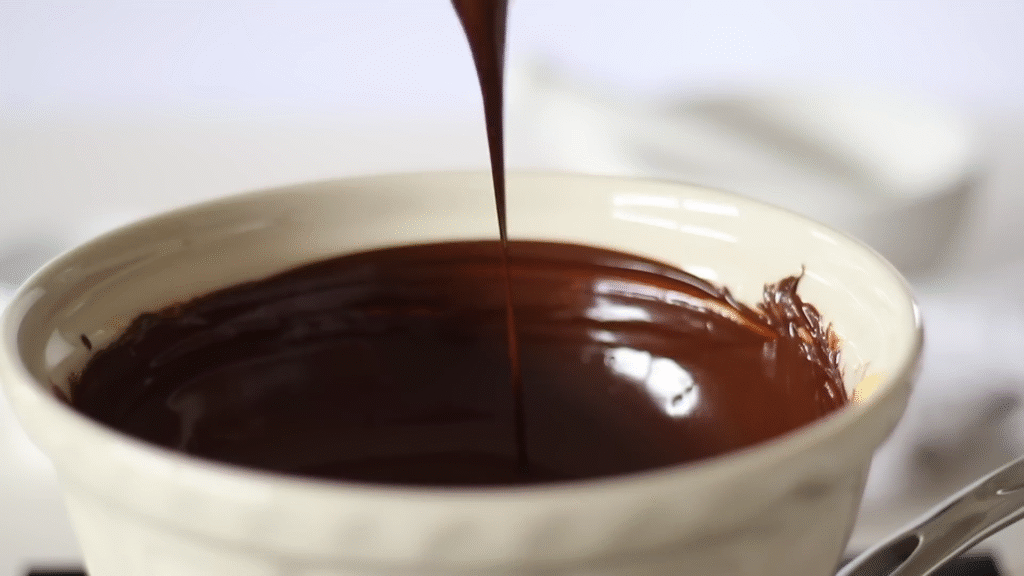
Start by melting your chocolate in a heatproof bowl. You can use the microwave in short bursts or a double boiler on the stove. Just be careful not to burn it—smooth, silky chocolate is the goal.
Step 2: Mix the Good Stuff
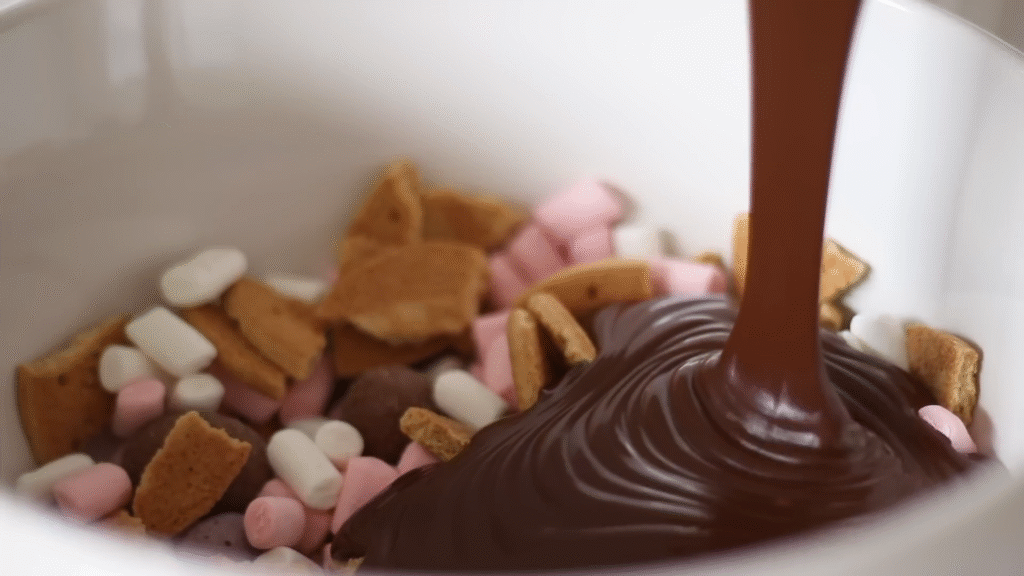
Once the chocolate is melted, stir in your marshmallows, crushed biscuits, and a handful of Easter candies. I usually save a few candies to sprinkle on top later so it looks extra festive.
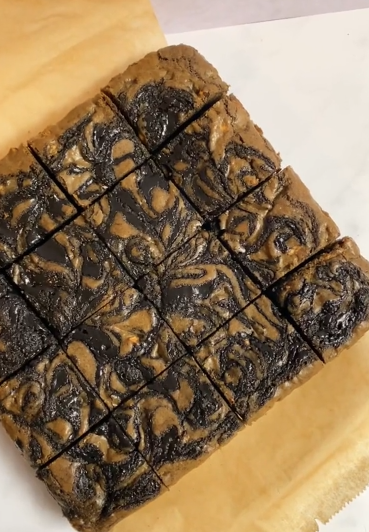
Step 3: Spread and Top
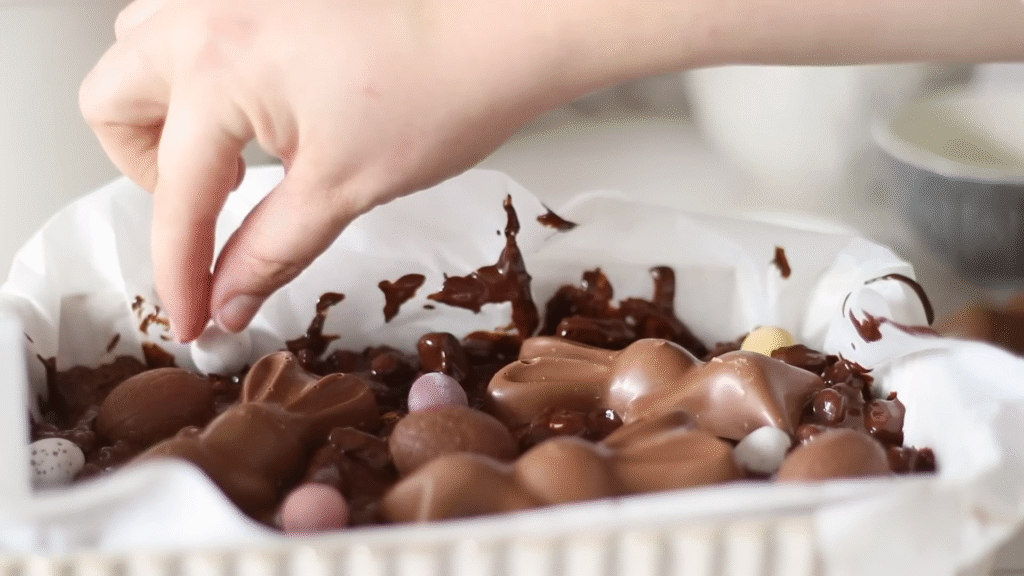
Pour the mixture into a lined baking pan. Press it down gently so everything sticks together. Sprinkle the reserved candies over the top.
Step 4: Chill and Cut
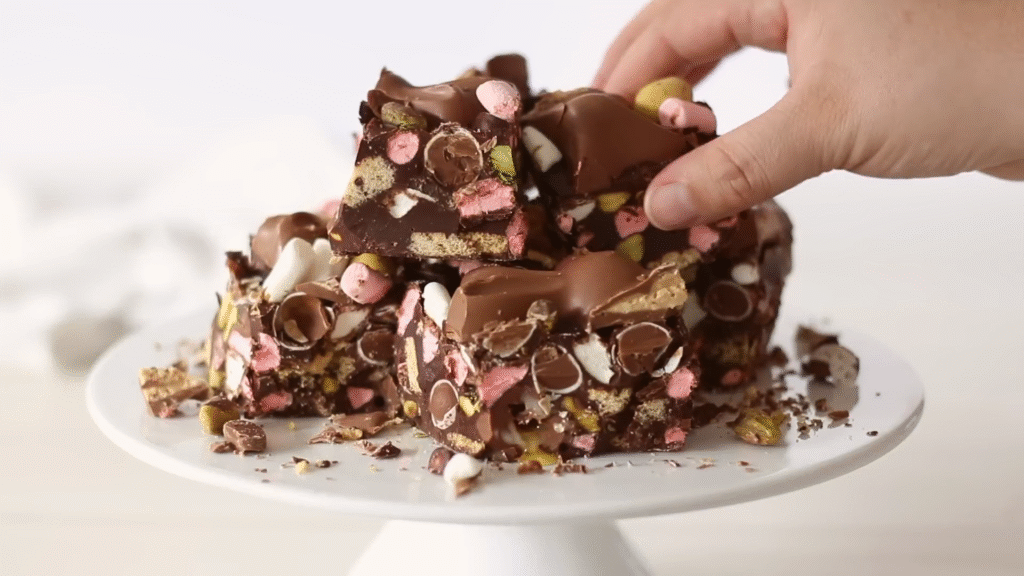
Refrigerate for about 2 hours until it’s firm. Once set, cut into squares or fun shapes. Now you’ve got Easter rocky road candy ready to share (or keep all to yourself—I won’t judge).
Tips to Make It Even Better
- Add White Chocolate Drizzle: Drizzle melted white chocolate on top for a fancy finish.
- Make It Nut-Free: Skip the nuts if you’re serving kids or anyone with allergies.
- Use Colorful Marshmallows: Pastel ones look so cute for Easter.
- Try Different Biscuits: Digestive biscuits, graham crackers, or even pretzels for a salty crunch.
Why You’ll Love This Recipe
I love this Easter rocky road candy because it’s simple, colorful, and always makes people smile. It’s the kind of treat that doesn’t take much effort but looks like you put in so much thought. Plus, kids and adults both go crazy for it.
If you’re like me and you want a no-fuss dessert that everyone will love, this is the one.
Storing Easter Rocky Road Candy
- Store in an airtight container in the fridge for up to 2 weeks.
- If you want to prepare it early, you can even freeze it. Just cut it first, wrap the pieces, and store in a freezer bag.
FAQs About Easter Rocky Road Candy
Q: Can I make this ahead of time?
Yes, this is the perfect make-ahead treat. Just keep it chilled until serving.
Q: Do I have to use marshmallows?
They’re classic in rocky road, but you can replace them with more candies or dried fruit.
Q: Can kids help make this recipe?
Absolutely! Since there’s no baking, kids can help stir, mix, and decorate.
Q: Can I use white chocolate instead of milk chocolate?
Yes, but keep in mind white chocolate is sweeter, so balance it with salty nuts or plain biscuits.
Q: How do I stop the marshmallows from melting in the hot chocolate?
Let the melted chocolate cool slightly before mixing in the marshmallows. That way, they hold their shape.
Q: What size pan should I use?
An 8×8-inch square pan works great, but you can use any size depending on how thick you want the bars.
Q: Can I add peanut butter?
Yes, stirring a spoonful of peanut butter into the chocolate makes it extra creamy.
Q: Is this gluten-free?
If you use gluten-free biscuits, then yes.
Q: How do I cut clean squares?
Use a sharp knife dipped in hot water, then wipe between cuts.
Q: Can I wrap these as gifts?
Definitely! Wrap them in clear bags with a ribbon, and you’ve got the cutest Easter treat to give away.